")
Setting up the Madcap chassis
The Madcap is a buggy for leisure but it is gifted for racing. That's a good moment to get a quick overview of the possible setup.
- Toe in / toe out
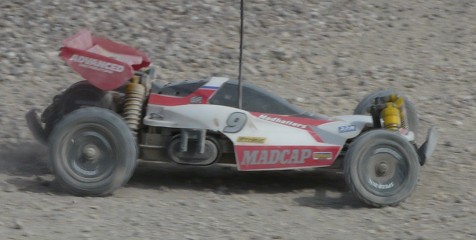
This is the angle that each wheel makes with the longitudinal axis of the vehicle as you can see on the first above photo. Pointing like an arrow (toe in), you'll get greater straight line stability but a sluggish directivity in corners. The "V" position (toe out) is the opposite. With a 2WD vehicle, it is better to toe out since most of the weight is on the rear of the chassis to get a better traction... scarifying the front drivetrain directivity. Be careful: the above photo gives the false impression that the toe out is very consequent. In real, you can hardly notice it since the angle needs to be very low (about 2 degrees). You can set this up by adjusting the steering tie rod length.
- Camber angle
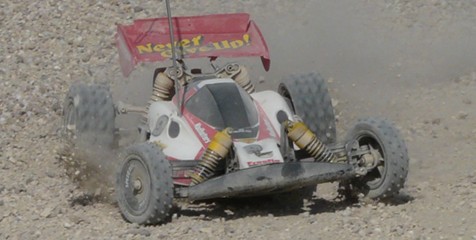
This is is the angle made by the wheels between the vertical axis of the wheel and the vertical axis of the vehicle when viewed from the front or the rear as shown on the second photo above. It is negative when the wheel top goes away from the chassis frame and positive when the wheel top comes closer to the chassis. The camber angle is only useful when negative: when cornering, the chassis rolls (to the corner exterior) and this setup places the tire naturally on the ground which gives a better grip as a greater surface of the tire is in contact with the ground. This setup is made by adjusting the rear drivetrain tie rods. On my Madcap, these tie rods are not adjustable so this is Tamiya "factory" setup.
- Front dampers
Their setup should be very soft in order for the front drivetrain to remain as much as possible in contact with the ground. This means using the three hole piston and soft springs, even if you may have to use spacers to avoid the lowering of the front drivetrain. Furthermore, the chassis gives you three choices when fixing the damper base: close to the chassis for a better ground clearance, at the middle for a neutral setup and close to the wheel to lower the ground clearance. On the first above photo, the setup is neutral. I will modify it to the dampers close to the wheels: the ground clearance will be lower and this will bring more weight to the front drivetrain. This way, I'll get a better directivity in cornering.
- Rear dampers
After trying, the best setup is intermediate: the two hole piston. For choosing springs, it is easy: the chassis (with the stick pack) should lower a little bit when you put it on the ground (by 2-3 mm maximum). So either choose soft springs and eventually add spacers or stiffer springs without spacer. To fix them, the chassis gives you two choices at the top and three at the bottom as shown on the second photo above. After some tries, I found that the best is to use the outer superior fix at the top and the inner fix at the bottom. This provides a better ground clearance and thus, a better suspension travel.
This chassis setup is perfect for me on pothole off-road track: for in-door use on carpet, the setup will be completely different (a much stiffer suspension and a much lower ground clearance for example).
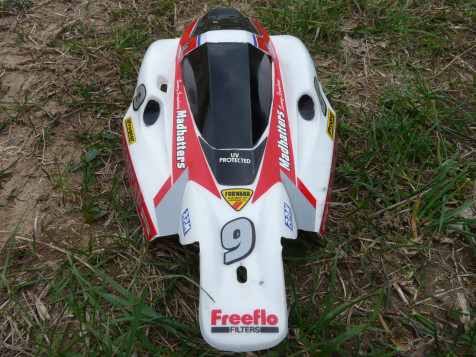
The Madcap bodyshell
Quite a lot of work for it since it was very dirty and many stickers are no longer well applied. The cockpit and the side air intakes have been badly painted with indelible ink. The wing suffered a lot and also shows a very sad repair: I still don't know how to give it back a decent aspect.
As a first step, I removed every sticker being careful not to torture the fragile lexan. As I have a complete sticker sheet, the decoration will be totally renewed. Then, I left the body and wing take a night long bath of hot water and washing dishes liquid. The next day, I took the famous modeler toothbrush to clean the remaining dirt and strange cyanolite spreads that hopefully did not melt the lexan. Unfortunately, the body has some marks that are directly into the lexan and that I could not remove.
Afterwards, I slightly re-cut the body as it was not well cut at some places, and then I painted it white. Theoretically, the cockpit and its rear side should be painted black. Unfortunately, the indelible ink resisted to my cleaning. So, I solved the problem by painting the black color from the outside of the body (you should always paint lexan bodies from the inside). The cockpit sticker are not dark enough and the ink marks could be seen through them.
I just had to apply the stickers to finish the decoration and get a pretty good result given this model age and its state when I received it.
Now, the wing. I couldn't find how to repair it, so I decided to paint and decorate it straight away. I may rework it later to give it a better aspect, probably by cutting the damaged part. The only other option would be to buy a new one, but this is not in my future plans.
So here's the result after working for 2 days on the body:
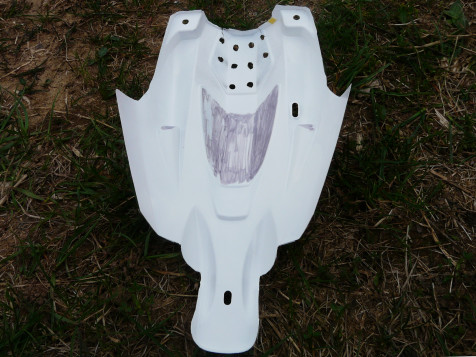
On the second photo, you can see the ink marks that resisted to cleaning. This is why I couldn't use the cockpit stickers as the marks could be seen through them. With the exterior painting, the problem is solved.
On this same photo, you can see the holes drilled by the previous owner on the cockpit rear. This massacre (Holes were probably done with a screwdriver, here I re-cut them) was probably meant to give air to the electronic speed controller that was fixed on the chassis platform. Anyway, this swiss cheese was just useless: if the speedo was too hot, he should have change the gear ratio to setup a better one for his motor. I just doubt that these holes had the slightest benefit for cooling the speedo. but for ruining the body, they are just great.
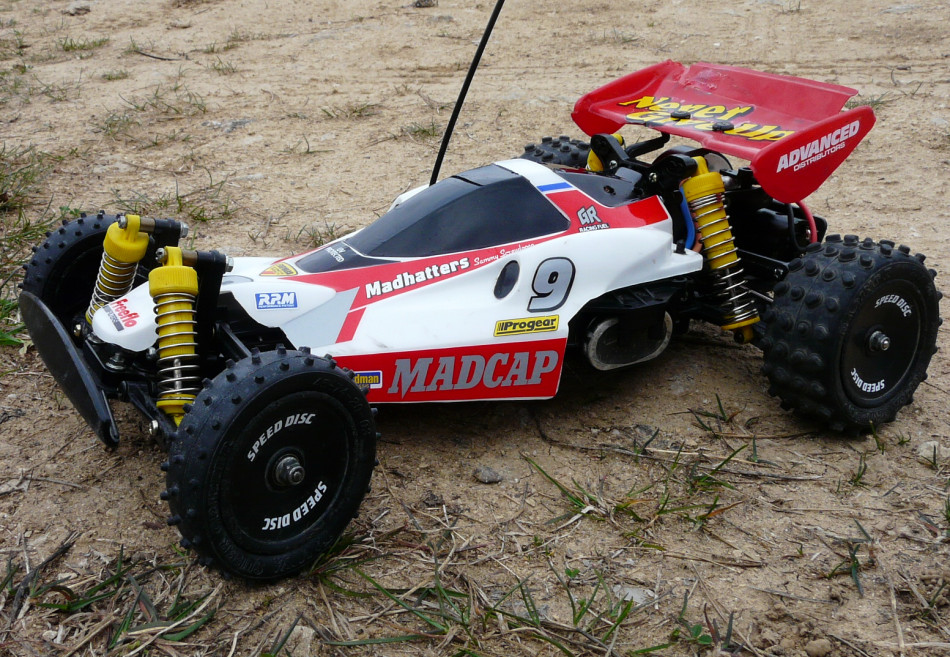
My Madcap is now finished and ready to take its first run. I only regret the sorry state of the body on which I couldn't repair much. But I may try to re-cut the wing to get rid of the damage part. Anyway, I didn't spend a lot to restore this Madcap, which would have been a lot different if I had to buy a new complete body.
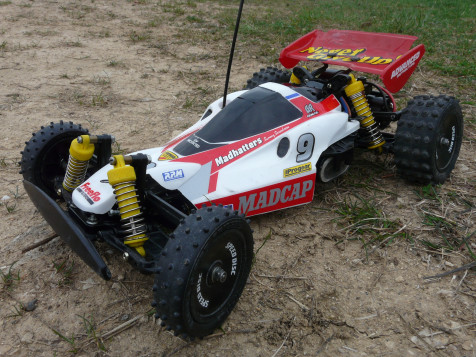
But for now, I'm really impatient to run my new Madcap.
First runs
It took place on a pothole dry off-road track with not much grip.
The first impression is that my gear ratio choice is the good one since the Madcap gets a very nice top speed and the Sport Tuned motor gives plenty of torque at low speed. Best of all, it remains cool.
Overall, this buggy runs pretty well. The handling is close to perfect, racing lines are precise and it is pretty well balanced. I could directly compare it with my Fox, a buggy that I especially like to drive. The Madcap is lighter: not sure if the difference is huge, but the Madcap provides quicker responses. This can also be caused by the motor since my Fox "only" runs a standard Mabuchi 540.
The Fox front drivetrain is much smoother than the Madcap's and it is a great benefit, either for cornering on generally speaking on this difficult track. So I will modify the front dampers fixations and replace the springs by softer ones.
Apart from a rear turnbuckle break at his end of the run (a part I didn't change), the Madcap gave no bad surprise. In fact, this first run was a real pleasure and made me discover a very interesting buggy. One more to run as often as possible, which won't ease my choice in selecting models to run from my collection 

Last update: february 2013
In the end, I sold this model that was driven rarely. The first reason was the usual track quickly became undriveable, and that I couldn't find any other decent place to drive it. However, I must also confess that I could have run it in other occasions but preferred to run other models instead.
In retrospect, I faced a paradox with the Madcap: it had racing genes (its complex transmission being an example of it), but it was made for leisure. The Madcap is "easy" to drive since the chassis handling is very good: this is a true invitation to push the throttle since you feel very confident when driving it. However, driving mistakes are soon punished by breaks, but I was not able to determine whether they were due to the chassis design, the plastics getting old or past abuses.
I thought about this for quite long and I finally decided to sell my Madcap: despite the pleasure to drive it, the fear of constant breaks was stronger.
Related article