")
The ORC Amemiya SGC-7 bodyshell
As you noticed when I presented the TB-03 line-up, you don't have many bodyshells to choose from. Of course, any other Touring bodyshell can fit, including the "low profile" thanks to the IFS system. Nevertheless, I wanted to stick with the TB-03 series. Among these, I like three of them:
58409 ARTA Garaiya

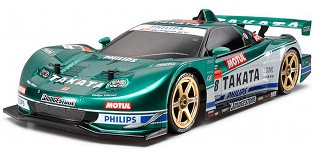
58424 Takata Dome NSX 2008
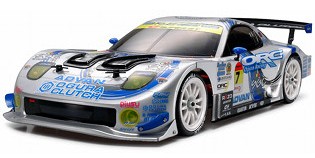
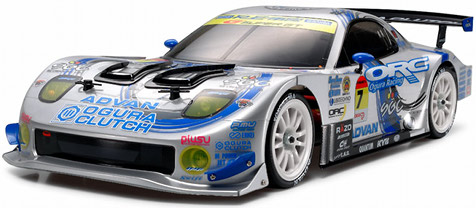
58425 ORC Amemiya SGC-7
Photos © Tamiya
Well, that is all but the Nissan GT-R R35  .
.
A several day search to source the bodyshell and the required colors to replicate the boxart lead me to a pitiful result: not even 1 single online store had both the bodyshell + the "main" spray cans available! As for sourcing the corresponding rims at the same place, just forget it: believe me, I performed exhaustive searches.
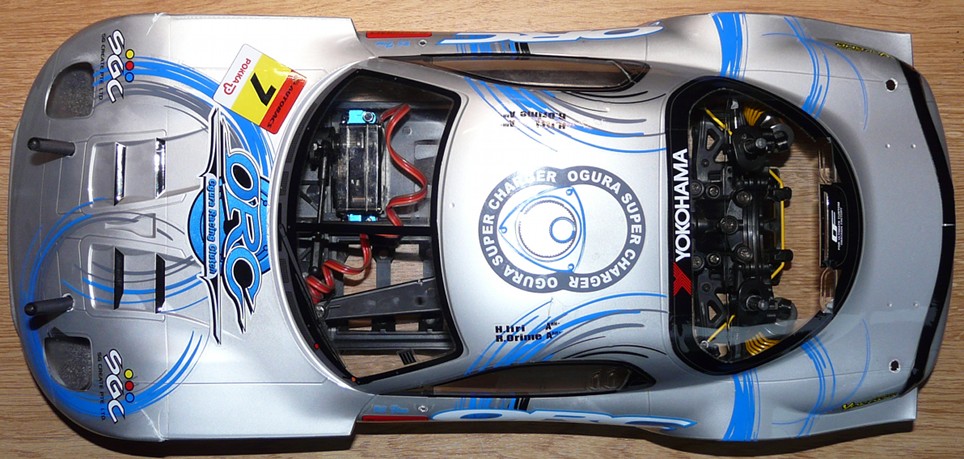
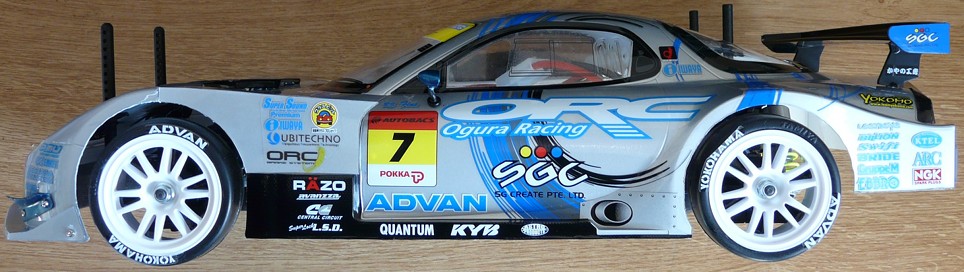
Anyway. I finally got everything I needed: so this will be the ORC Amemiya SGC-7, the Japanese Super GT Championship version of the Mazda RX-7.

Photos © Tamiya
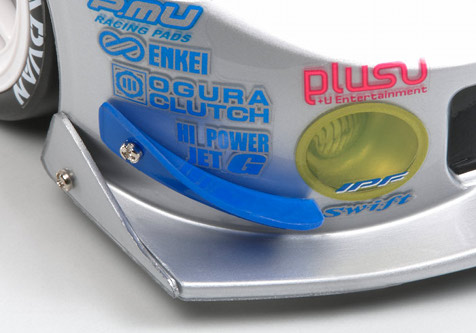
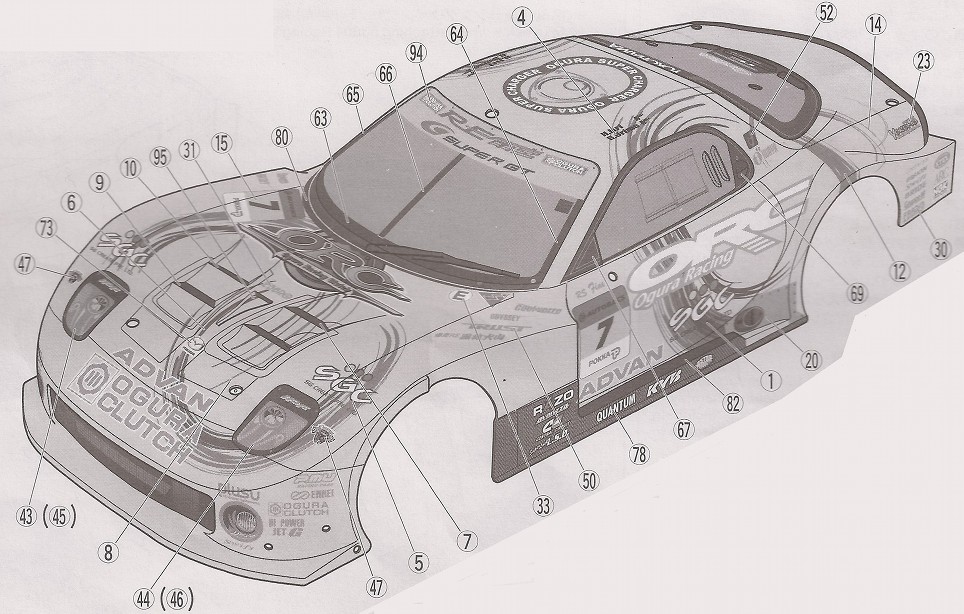
Nice, isn't it? Stickers everywhere, but also amazing aerodynamic bits that Tamiya faithfully replicated, especially on the front bonnet and on the front spoiler angles. I anticipate they will require much more time to work on than to disappear at the track...
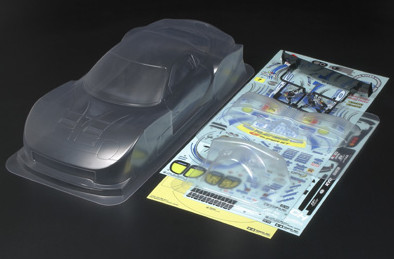
When opening the bag, you find two big sticker sheets, window masks, a screw bag and a part tree for the rear wing and mirrors. On the lexan side, you obviously find the bodyshell in itself, but also several additional parts for the headlights, fog lights, and the aerodynamic elements. Quite a work pile! I want to do it boxart, but I preferred to replace the recommended Brilliant Blue (PS-30 and TS-44) with X-13 Metallic Blue. Reason is basic: I couldn't find these spray cans...
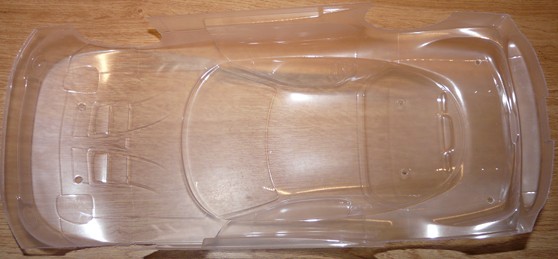
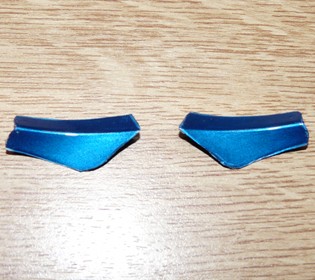
Before painting, I first cut the bodyshell: scissors, cutter-knife, patience and an almost two hour job. I also drilled the body mounts holes, but also those needed for the mirrors and the aerodynamic bits. For an easier painting process, the other lexan parts will be first painted and then cut. These parts even allowed me to perform some painting tests: as a matter of fact, you can alter some paints finishing aspect depending on the background color. About any "metallic" paint like the PS-12 Silver (this bodyshell main color) can be altered, and the same applies to the X-13 Metallic Blue. To make these colors brighter, I will apply a white background with PS-1 White (and X-2 White under the X-13 Metallic Blue for mirrors).
As you know, lexan is to be painted from the inside: but, as some of the aerodynamic bits show both faces due to their tortured shapes, don't forget to first apply the color you want, then white as background, and then again the color you want. Next, you will need to cut these parts: again, anticipate another two hour job because the shapes are really difficult to cut properly.
Front lights
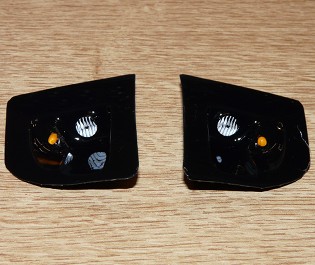
Fog lights
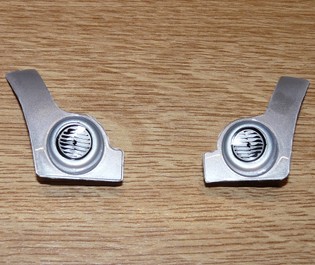
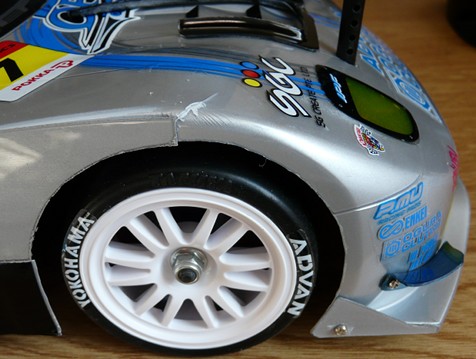
Fenders
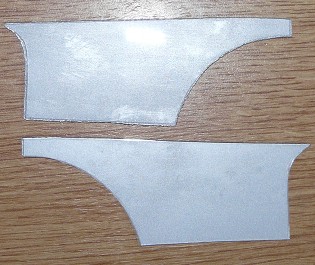
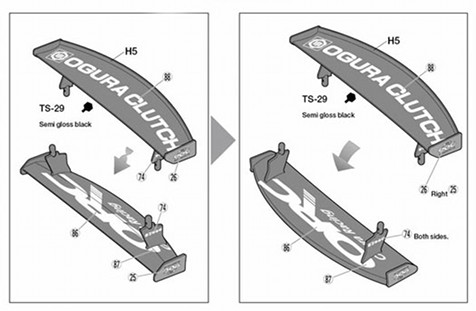
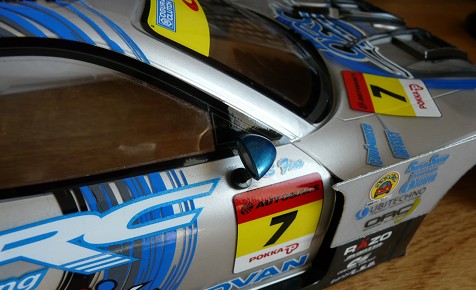
Spoilers
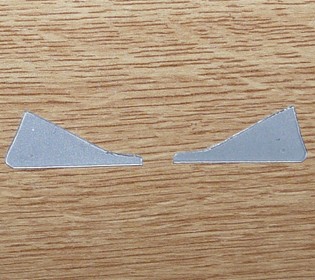
Canards
Fins
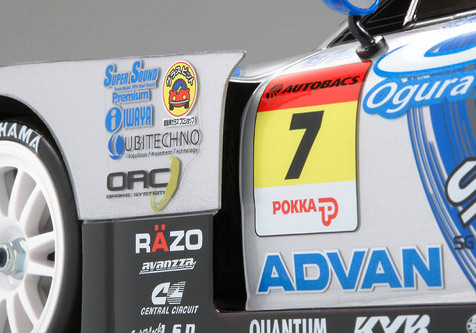
A quick note about the orange blinkers on the first photo: Tamiya supplies stickers to avoid painting them. My advice: these stickers are a nightmare to place and they peel a few hours later. Just paint them X-6: faster and easier method.
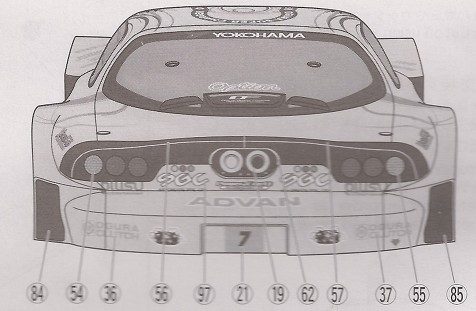
Now that painting is finished, let's start with decorating the bodyshell: two very big pre-cut sticker sheets (few!) are ready for action. Just know it will take you hours: be patient, and most important, carefully study the manual instructions. Just for the fun of it, here's what you will face:
Photos © Tamiya
I added the manual addendum info you can get from Tamiya USA since there is a little mistake on the instruction sheet supplied with the bodyshell. Anyway, 97 different stickers as per the instruction sheet count: the fact is there are more than 100 stickers because several stickers are in multiple copies. For those of you who don't want the front lights and fog lights as separated parts to be double sided tapped from the inside of the bodyshell,Tamiya supplies stickers representing these elements.
Decorating the bodyshell requires time, a lot of time. This is the progress after 3 hours:

For your information, I think about 2/3 of the stickers were applied when I shot these photos. It is very important to respect the sticker numbering: some will help you place others more easily and others need to respect a certain order to be correctly placed for a nicer finish. Honestly, there are so many stickers that I hope the person in charge of decorations at Tamiya could spent some time on vacation after such a work.
A couple of hours later, after placing all remaining stickers and fixing every additional part on the bodyshell:

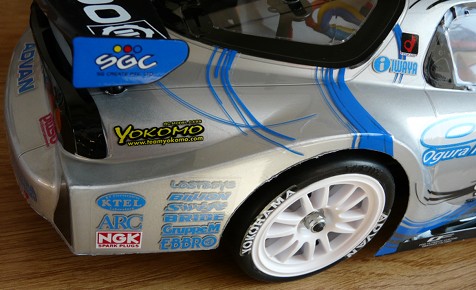
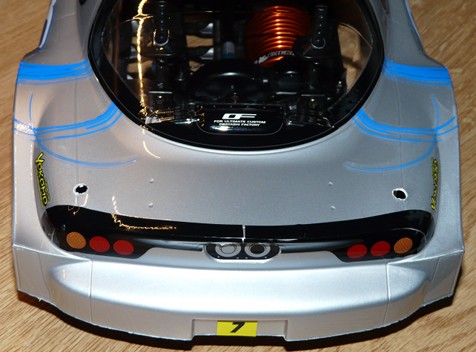
Unfortunately, the result is not perfect: this bodyshell is really complex to make, both for cutting and decorating. To get an idea about what it takes, I needed 4 hours to cut all the parts, 5 hours to place all the stickers and to fix additional parts to the bodyshell (lights, fenders, aerodynamic bits). Not counting with the time spent in painting.
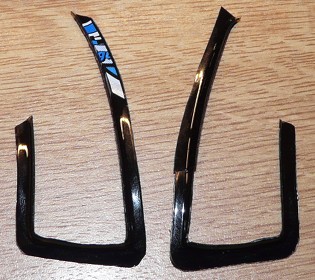
In addition, the second photo shows a worrying tear on each front wheel arch. I had previously noticed them when I got the bodyshell but I thought they were marks on the protective film. In fact, they are tears, right where I would locate this bodyshell weak point: in case of a front hit, the bodyshell will bend right where there is less material. So I will need to seriously reinforce this area with tape applied from the inside, hopping it will be enough to avoid the problem getting worse.
To complete the decoration, I initially thought I would add a driver cockpit: however, there is very few space available above the electronics, especially because of the motor and battery pack cables which are very difficult to move out of the way. Adding such an element would make access to the chassis quite difficult when my model is made to run quite often at the track.