")
The Suzuki Escudo Pikes Peak bodyshell by HPI
I would naturally have talked about the chassis first even if there is not much to do on it at first sight. However, the bodyshell I chose being a bit specific, it will require some work on the chassis.
For this chassis, I wanted the bodyshell to have a radical look, something mean and wild, a bodyshell that would immediately say brutal power and speed. I first thought about GT cars because of their lack of compromise but their very low front profile couldn't fit the TA-04 chassis. As I couldn't find what I was looking for in Tamiya's offering, I had a look over other makers. In the end, I went for an "off standards" bodyshell:
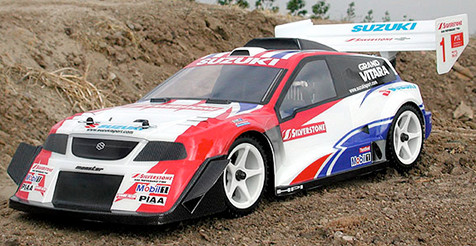
This is the Suzuki Escudo Pikes Peak bodyshell from HPI (reference 7464). As per the radical, wild and mean look, this is right what I was looking for, even if everyone may not like the overall look. This is the replica of the car that settled the best times in the famous Pikes Peak Hill Climb race since 2006:
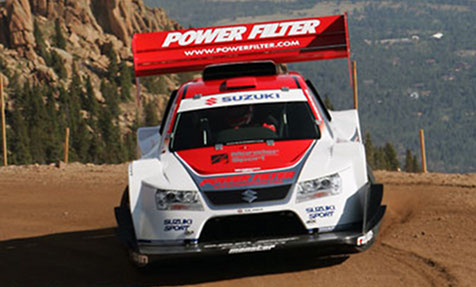
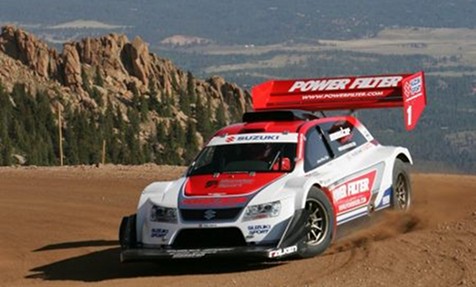
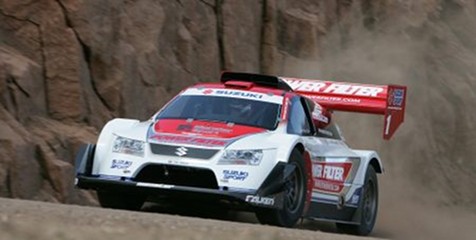
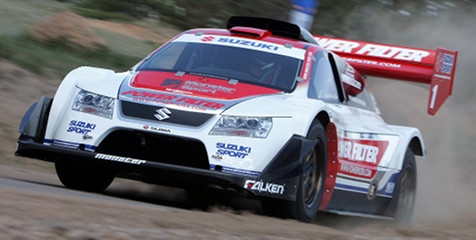
The "civil" version of this car is either called Escudo, Vitara or Grand Vitara depending on continents. The race version ("Hill Climb") constantly evolved over the years, from mechanics to shape and decoration aspects. The livery by HPI is meant to represent the Pikes Peak 2006 version: above photos prove it was different. Even Monster Sport official website never saw this livery, whatever the race or the year. I find this livery by HPI to mostly look like a 3 years old designer work and can't pretend to be realistic. I still don't know how I can handle this to make it look better: anyway, I think I should get something better just avoiding to apply the blue stickers  .
.
This HPI bodyshell has another problem: it is meant for 200mm wide chassis and the TA-04 is 190mm wide. Please note HPI is not responsible for this: we'll see how to handle this later on in the chassis section.
The first thing you see on this tortured shaped bodyshell are the angles: this is the price for a radical look but this has consequences on decoration. In addition to the windows masks, 2 full sheets of stickers are provided. Some stickers are really big (thus difficult to apply) and many are meant to cover angles. But since I decided to change the livery, I needed a more precise view of the shapes and how I could imagine an alternative livery: this is the reason why I remove the protection film and started to apply the main stickers in order to get an overall idea of the body shapes and structure. This sole operation required a full day to achieve the following result:
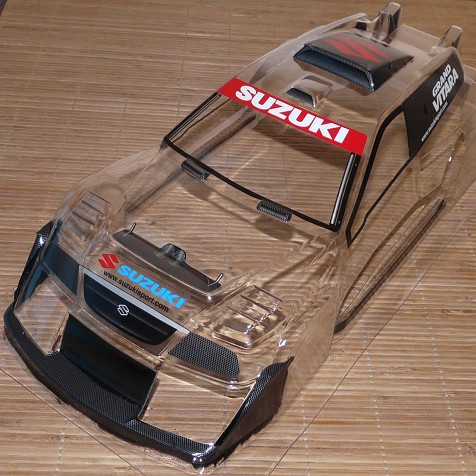
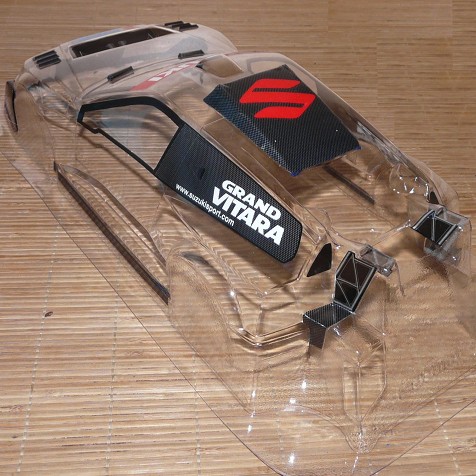
On these photos, only the "structure" stickers were applied. To give you an idea on how difficult it is to adjust them perfectly, just know that the "Grand Vitara" side sticker is one piece from the rear to the front window borders. The whole front lower part is made of only three stickers: one for the middle air grille and one for each side from the center front to the wheel arches, including the prominent shapes.
Despite of being so complex, this bodyshell has two assets:
- the pretty thick lexan resists to all the required operations when attempting to precisely adjust the stickers.
- the stickers are resistant and stick very well: this is a chance given the number of tries you need to correctly position the stickers, including the fact they need to cover an incredible number of shapes and angles.
Despite of these assets, I think this livery can't resist to time: not even considering constraints when running this bodyshell, the stickers have to cover so many sharp angles that I doubt they can resist to such a treatment.
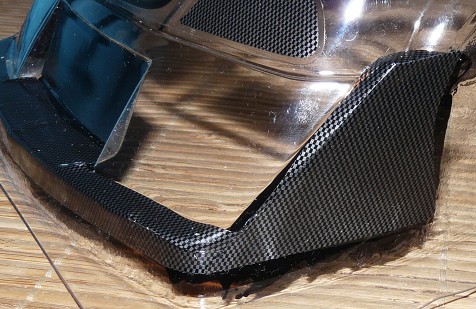
I guess you noticed the black paint spilling off the front spoiler: they are meant to be. In fact, applying these stickers revealed this:
- precisely adjusting the stickers is very difficult and close to impossible due the prominent shapes. I couldn't manage to adjust everything to perfection so spaces between stickers would have been very obvious once the body's main white paint would be applied.
- the carbon texture reproduction is very realistic but it is a little bit translucent. With the white background, the carbon effect would loose realism.
This is why I used black acrylic paint from the inside of the body: it both provides a flat background to the carbon stickers and it fills the spaces left by those I couldn't adjust perfectly. Moreover, have a look back at the beginning of this bodyshell section: the first two pictures are those used by HPI to officially present their bodyshell. Have a close look and you will notice the front spoiler "carbon" stickers were not applied: they were painted black instead (same thing for the lower sides of the body).
I tried to picture the difference between a carbon sticker with a black background paint and another one without. To make it more visible, I placed a light inside the body:
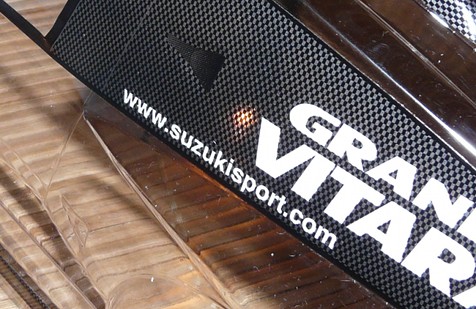
There is a problem with the carbon sticker part at the rear of the side windows: for a realistic look, it should be painted with a black background but this background would darken the (also translucent) white lettering (Grand Vitara and Suzuki Motorsport website address). A solution could be to paint the black background and to draw the lettering in white: I confess my paint skills don't allow me to do this. However, as the body will be painted in white, I will need to mask this part too. This is the moment to thank HPI for not providing windows masks for this part of the bodyshell.
Of course, using acrylic paint covered by lexan paint is not recommended since the acrylic poorly resists any hit. The solution is to use Tamiya PC type paints but unfortunately, I didn't have them in my stock: I will only rely on my driver's skills to limit damages. A good point to note: using different types of paint is pretty hazardous. The best is to use the same type of paints (PC/PS), or like here, paints from the same maker. When mixing, you may hit big troubles: try Humbrol's acrylic paints mixed with Tamiya's lexan paints to get a pure disaster.
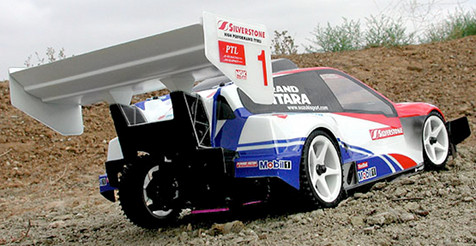
A problem you often hit when modifying the provided livery is the lack of stickers: the Power Filter sponsor is missing here. Next problem: the rear wing is white with red stickers on HPI's version whereas it is red with white stickers on my reference livery. So I had to find other stickers to achieve the desired livery. And since I couldn't reproduce the exact reference livery I wanted, I decided to stick as much as I could to it and to add a custom livery where I had to.
The result after several masking and painting sessions:
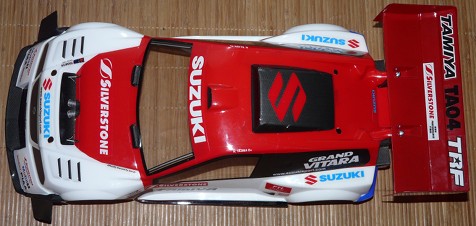
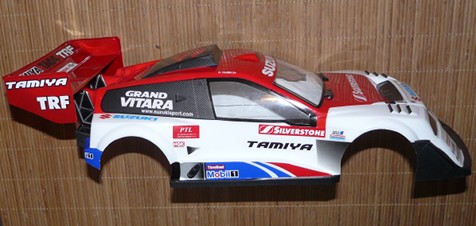
I prefer my result to HPI's standard livery but the result is still far from being excellent. The red tone is different between the stickers and the body paint, the red on the main body is brighter than on the rear wing (this is due to the additional white coats on the main body: the rear wing is only red), my masking techniques are still not excellent and I forgot to mask the "carbon" Grand Vitara stickers that now looks a little redish due to translucency. On stickers side, despite my efforts, many tend to peel after a few days due to the very sharp angles (despite the fact I applied them using a hair dryer). However, I am pretty happy with the result after cutting the body: despite it is pretty difficult in some places (especially the rear side and those damned wheel arches), the result is one of the best I ever achieved so far. By the way, special thanks go to HPI for providing a unique 5x1,7cm double-sided adhesive that's good enough to stick one unique front aerodynamic wing. I found that the second one as well as the two rear wing side panels are meant to stay by pure levitation force. Thanks anyway for the sample...
Well, as you could guess, I was missing stickers after I changed the default livery: I couldn't resist to apply alternative stickers in order to remind the great chassis underneath (sacrilege ).