")
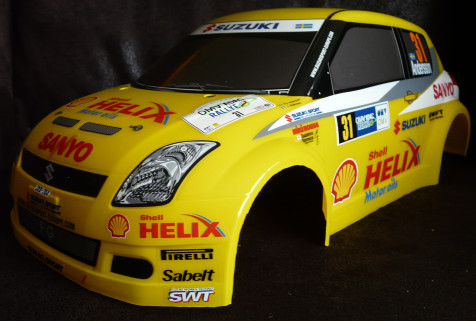
The Suzuki Swift Super 1600 bodyshell
Since I started with my first models, my technique for bodyshells evolved. Nothing revolutionary, just some practical hints:
- clean the bodyshell with washing dishes product
- cut the bodyshell
- mask / paint
- remove the protection film
- apply stickers
This is the most logical sequence to follow. Except for the Ford F-150 as you need to apply stickers that will guide you for masking.
In general, cleaning and cutting the body first is better since you won't harm the fresh paint. to cut it, the best is to use a cutter knife to draw the lines where to cut. Then just fold the lexan until it breaks right on the cutting line: you can only do this on straight line like the sides bottom. Everywhere else, still after marking the cutting lines with the cutter knife, just start cutting with scissors and then tear the lexan: it will naturally tear along the cutting line.
Next step is masking, especially the windows, and then paint:
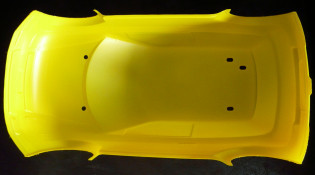
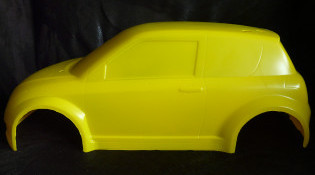

Yep, everything's there  . There's just no need to mask anything on this bodyshell since the windows stickers are provided. For those of you who really want "real" windows, just use the stickers as mask models.
On these photos, the body doesn't look great since the protection film is still on. Only remove it when the paint is completely dry as it will be useful to avoid scratches while the paint is drying (since you probably let your bodyshell dry on its roof). Now just apply the stickers to finish the bodyshell. This model needs two full decals sets to be completed (fortunately, they are pre-cut).
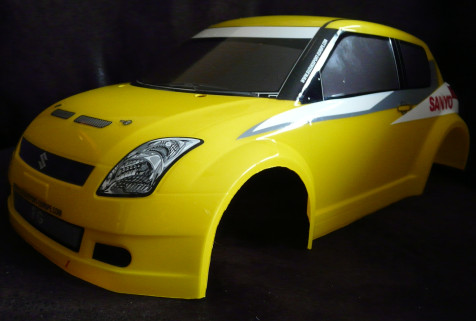
Front view with the first sticker set

Front side view with the first sticker set
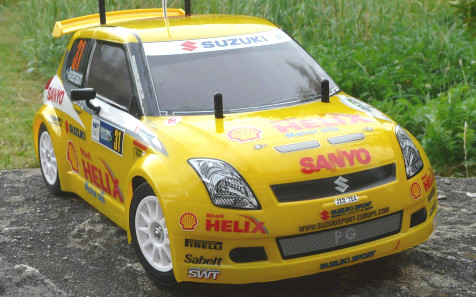
Front view with all the stickers
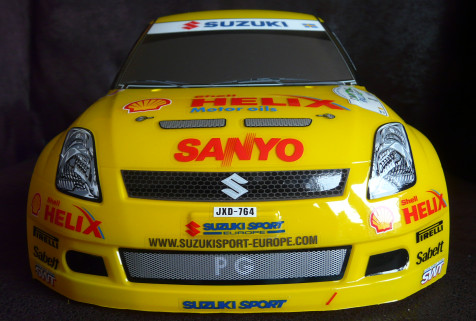
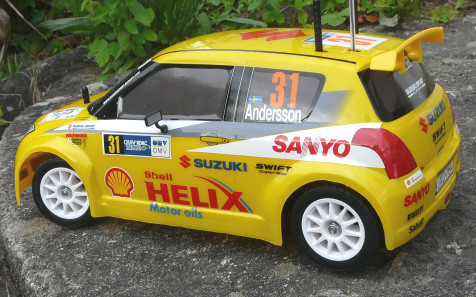
Front side view with all the stickers
The bodyshell is almost finished: for the moment, I left the rear wing and the mirrors apart since they are on the part trees. Applying stickers is not difficult since everything is pre-cut. Some are tricky to apply because they are either pretty big or need to be very well adjusted next to others. Completing the decoration requires at least 2 full hours because this car is just full of sponsors.
For decoration, I chose Per-Gunnar "P-G" Andersson's livery, one of the two official drivers of the Suzuki Swift Super 1600. Tamiya also provides the set for Guy Wilks's car but I preferred the Swedish driver: I thought he would be more gifted than a British driver used to drive on the wrong side of the road .
My driving skills being what they are, my cars sometimes tend to drive by themselves: any help from the real driver is much appreciated in such conditions . Though, I'm still waiting for Sébastien Loeb to drive my Citroën Xsara WRC...
To fit the mirrors and the rear wing, you need to drill holes in the bodyshell. That's pretty odd since the bodyshell already comes with 5 holes for the body mounts and the antenna pipe. Tamiya could have drilled the additional 4 holes while making the others: well, they didn't. The holes need to be 4mm for mirrors and 6.5mm for the rear wing: the best is to drill with the thinnest bit to begin and then finish with the one you need for each hole diameter.
Building the M-03 chassis
This step doesn't require much time and it quite easy thanks to the self-explaining Tamiya manual. The 8 type 1050 ball bearings are provided but 2 type 850 bearings and 4 type 1150 plastic bearing need to be replaced by real ball bearings. Please note that the 1050 ball bearings are specific to the rims mounted on this car: other M-chassis may require 1150 ball bearings. So be careful not to mix them with the 1150 ball bearings that take place into the gearbox (if there's some play then it's not the correct bearing).
One step to perform with care is the gearbox assembly: do not over tighten the screws or the gears will not move freely. Just screw until the screw naturally stops.
As for the the wheels, foam inserts are supplied to help the tires keep their shape for on-road use. The manual says to glue them into the tires: I didn't follow this advice since I doubt the insert can move once the tire is mounted on the rim. But don't forget to glue the tires to the rims.
After a couple of hours, this is the result:

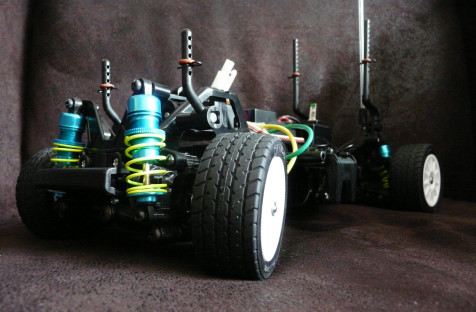
This chassis is totally stock, including the motor. I only completed the ball bearing set (2 type 850 and 4 type 1150), and replaced the friction dampers with hydraulic ones I had in my spare parts stock. As usual, I added "o-rings" on the body mounts to preserve scratch on the inner side of the bodyshell. I know they are just useless: the hours spent on this bodyshel will get ruined at the first corner I'll get too fast .
Another hop-up is the 53056 pin type wheel adapters: this is a "comfort" option I mount on every model. Plastic hex found on part trees quickly wore and always remain stuck into the rims. Metal adapters are more solid and changing wheels is much easier.
The chassis allows the use of 3 different motor pinions: 16, 18 and 20T. The latest is the only one provided, and that's great. Smaller pinions let you mount better motors but the Mabuchi 540 with the 20T pinion is enough to run this very light model and give it a very decent top speed.
There is not much room left on this chassis to store cable extra length, but compared to the Dark Impact, there's more than enough. Just place the electronic speed controller close to the motor and then place the receiver slightly to the rear end of the chassis. Then you will have room enough to cable-tie everything.
Once the chassis is finished and the stick pack is in, you will notice that most of the weight concentrates on the first third of the chassis length. This is normal since this chassis is front wheel drive and needs as much weight as possible on the front to get the best grip. As a consequence, forget jumps with it: this is an on-road chassis. But the risk is that the rear drivetrain may easily loose grip in corners as it is very light: be prepared for memorable roll-overs .
While I was gathering information to write this page, I read dozens of forum pages giving tons of advices for M-chassis setup, hop-ups and other hints. When compiling them, I soon realized I couldn't trust that material: just about anti-roll bars, I should have installed them at the front and rear drivetrains, only at the front or only at the rear. Well, anything and everything, you choose. And not only for anti-roll bars: the advice orgy concerned everything else. Finally, I found the Aussie band at RC-Mini, and that's the end of the world: forget urban legends and mythomaniacs. Their conclusion is rather simple: if you need to install any hop-up on an M-chassis, first hop up the driver, not the car.
Some photos
I quickly took photos while the car is still brand new as I guess the first run will probably leave scars . The next move will be to set a date with my friends Boo54, J-F and Teamneogordini for an M-chassis session...
The real Suzuki Swift Super 1600 in action
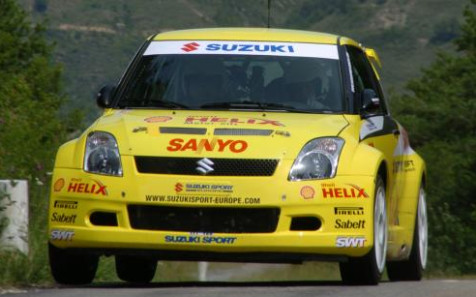

Credit: David Farquhar / Suzuki
In stock form, the M-Chassis is amazing to drive. But it is easy to improve its general handling and its overall speed up to the point of turning it into a serious race car. Serious using the “M-Chassis way” though: fun, faster fun and fun at driving it  .
.