")
Ferrari 312T3 bodyshell
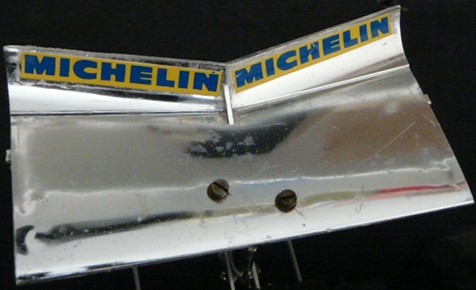
After a closer inspection, the bodyshell is in perfect condition apart from not having been painted so the red plastic turned a little bit dull. Unfortunately, the chrome parts are the one that suffered most since the front wing received several impacts and the rear wing sides are missing. Moreover, some parts need glue, the driver requires to be painted and I will have to find a solution for the missing bodyshell fixations.
Before to start, let's compare the model as presented in Tamiya's Museum and my model as it came:
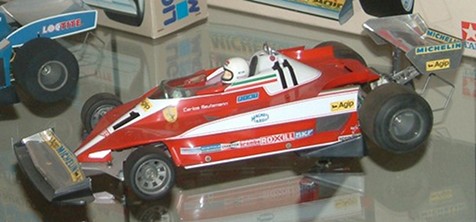
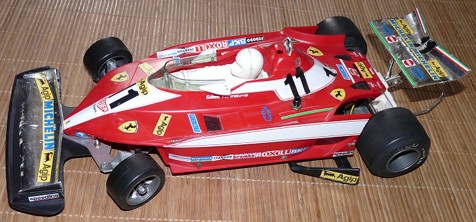
Sticker festival! This model featuring two bodyshells, it also features two full sticker sheets. Well, almost every sticker is there: the good news is there was no window masks...
In the middle of this sticker crowd, you may notice a mistake: the driver's name is Gilles Villeneuve but the car numbered 11 was Carlos Reutemann's. This is a detail, but the challenge was to notice it out of the sticker crowd.
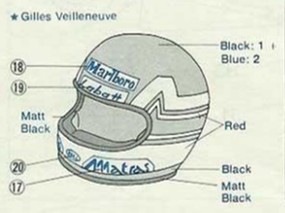
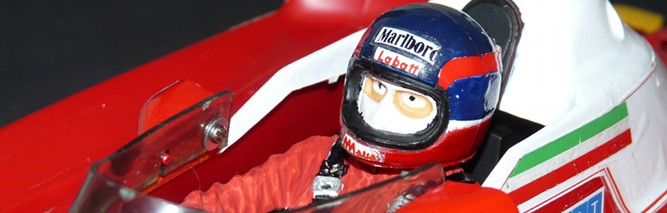
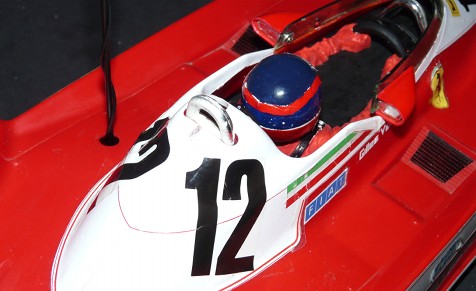
Well, facing so much work, I preferred to start with the painting of the driver that seemed easier. Bad news: if the driver's body is rather easy to paint, the face is always a bad moment for me (even if there's not that much visible in the helmet). Even worse: Gilles Villeneuve's helmet decoration is very complex. And guess what? This time, no sticker: everything needs to be hand made, except sponsors.
I did my best but I'm not talented enough for a realistic result. By the way, take your time when reading the driver's name from the manual:
So now, back to the sticker-crowded bodyshell: I decided to remove any useless or misplaced sticker. Unfortunately, despite tons of care, over 30 years old stickers suffer a lot when you remove them: apart from the risk to tear them, the letters crack because the ink is too dry and not longer able to follow the sticker torsion.
Once I was done, I cleaned the bodyshell with the Tamiya 87118 Polycarbonate Body Cleaner. It is sold to clean lexan bodyshells or even as a paint remover (only works in limited conditions), but I found it pretty efficient to remove the glue left by removed stickers. Be careful though not to use it on chrome parts since the product alters them. However, the WD-40 revealed to be perfect to clean chrome parts: don't forget to perform tests on non-visible areas before applying it to exposed surfaces.
So now, the moment of truth: how to apply 30 years old stickers that don't stick anymore, not to mention they wind up on themselves after their removal? I tested two techniques that provided correct results:
- Scotch + glue: the basic idea is to tape a transparent (or invisible) band of scotch tape under the sticker, to re-cut it to the right shape, and then to apply glue on the scotch tape before applying the sticker on the bodyshell. Good news: the scotch tape will make the sticker more rigid, reducing or even eliminating the winding. Bad news: the scotch tape makes the sticker thicker thus more visible on the bodyshell.
- Glue only: forget the scotch tape part, directly apply glue to the sticker underneath. Good news: no thick sticker. Bad news: the sticker is more delicate to apply on the bodyshell because of the winding. Thus, corners will need more care to be correctly glued but you still can add a discrete piece of transparent sticker to make extremities stick better.
Thanks to the very impressive number of useless stickers, I could test different glues: I got the best results with the UHU Stic. The thin white line at the bottom of the bodyshell side is a sticker cut from the side of a leftover decal sheet from a previous project. Here's the result:
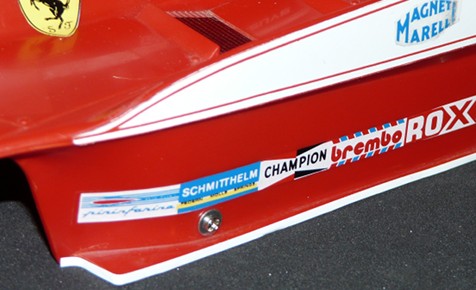
The UHU Stic has 3 good aspects: the glue is transparent, it doesn't bleed and any leftover can be easily removed with the Tamiya 87118 Polycarbonate Body Cleaner. When cleaning the glue, be very careful not to touch the stickers since the product alters the ink.
After the sticker affair, I went for details: painting of the motor, the air intake (the big blob behind the driver's head), the white bands around the cockpit and the rearview mirrors.
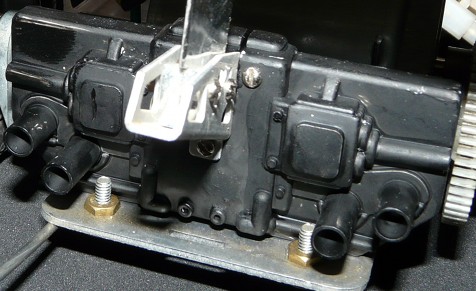
Apart from the rearview mirrors that were painted TS-8, I used Tamiya acrylic X paints for everything else. Including the white air intake complement to the side stickers and the cockpit white line surrounding. As for the three #12 stickers, I found them on the "generic" numbering sticker sheet (reference 66453).
Of course, the final is not perfect: the stickers that were not in great shape suffered from the removal torture. But the global result is much closer to the original decoration. The best would have been to proceed with a new sticker sheet and a painted bodyshell: unfortunately, the big white stickers could not be removed without severely damaging them leading to serious problems for re-applying them. And no, I didn't dare to draw and paint them.
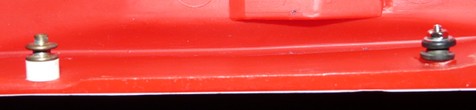
The body mounts also needed some attention:
Original body mounts
Custom made body mounts
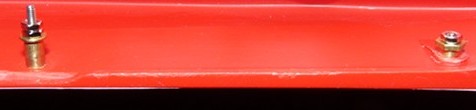
The longer mounts at the left sides of the photos are the rear body mounts. I only tried to copy the way they work by using what I found to match the better in my hardware.
However, I couldn't find any proper solution to remake the rear wing sides: I was missing the material, how to make it chrome and the required mounts that are missing on my model. Unfortunately, it will definitely miss them.
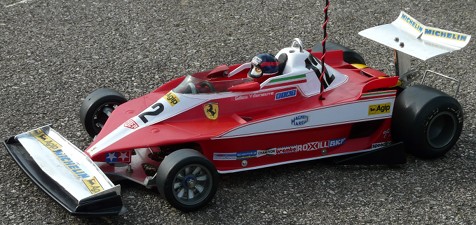
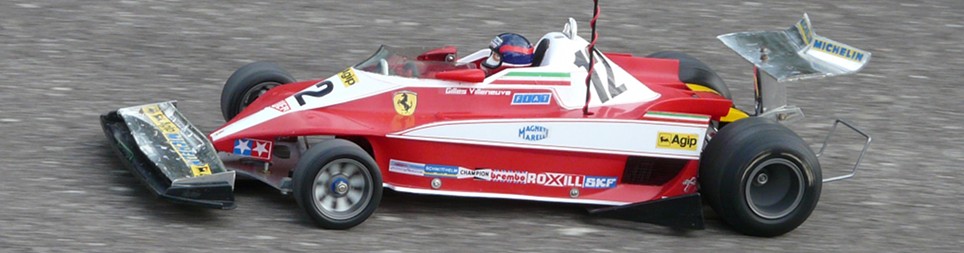
It is now time to fit the bodyshell back onto the chassis:

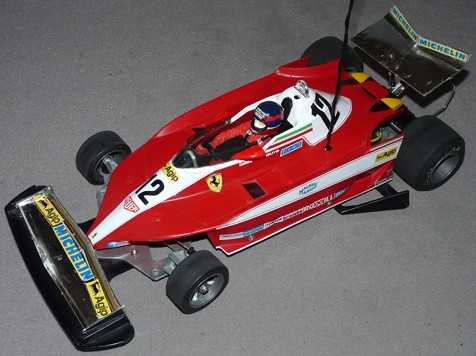
I think the result is quite good and my first impression was "hey, there is more bodyshell" without the sticker festival it came with. But now, go to the track!
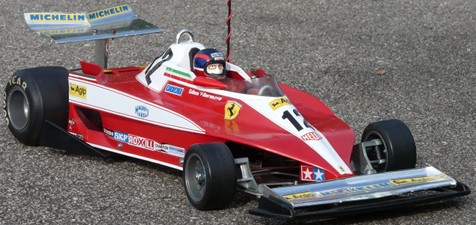
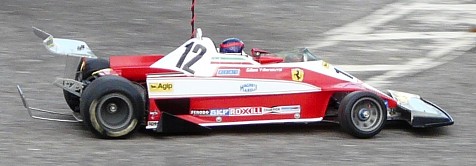
First run with the Ferrari 312T3
Again, we arranged a meeting to test the model at our usual track with my friend David from RC 4 Old Nuts. The Ferrari 321T3 looks quite massive but this is in accordance with its weight: this is vintage, it does look so and you can feel it when carrying it to the track.
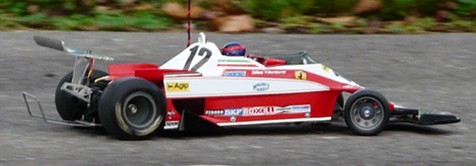
This model really looks solid, and after the first laps, it proves to be. But don't be too optimistic hitting the throttle: the Mabuchi 540 motor is a real beast into this model. Without setting limits on the radio, the car is out of control as soon as you reach half of the throttle: this is due to the lack of differential, to the old tires, but also to the motor power. Basically, either you limit the motor power to 50% with your radio setup, or you'd better stick to the Mabuchi 380 motor.
Nevertheless, once the power was limited and once the driver learned to be very smooth on throttle when exiting corners to avoid spins, the Ferrari 312T3 revealed to be pleasant to drive:
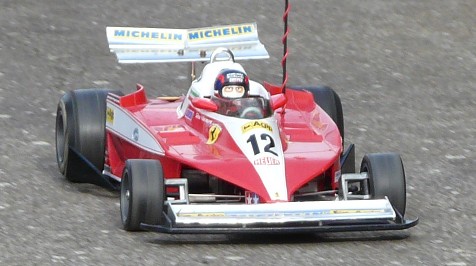

Despite the tires providing symbolic grip, the Ferrari 312T3 overall handling is surprisingly good and well balanced for such an old model. I confess I would be very curious to test this model with foam tires on a high grip track (like carpet): apart from its "titanic" weight compared to modern chassis, I think it could be quite surprising. Whenever I can test this, I will update this article.
Related articles:
- 58003 Tyrrell P34 Six Wheeler
- 58014 Martini Mk.22 Renault
- 58053 Road Wizard F1
- 58069 Williams FW11B Honda F1
- 58084 Ferrari F189 Late Version - F101
- 58114 Footwork FA13 Mugen Honda - F102
- 58179 Williams Renault FW18 - F103RS
- 58288 Ferrari F2001 - F201
- 58026 Renault 5 Turbo