")
Electronics with the XV-01 chassis
I am not used to dedicate a whole section to electronics when I present one of my models. In fact, I confess that I consider electronics as necessary evil for our models, so clearly not something I like, But here with the XV-01 chassis, I have to because this matter is pretty complex to deal with.
 The steering servo
That is the begining of hostilities:
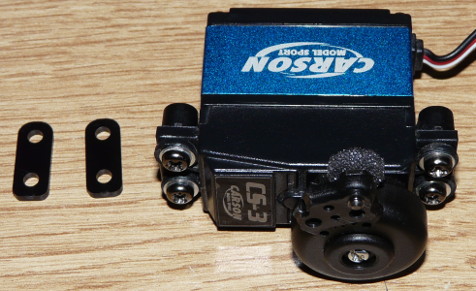
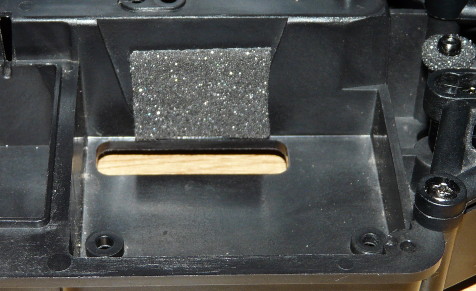
On the first photo, the standard Carson CS3 servo, a clone of the famous Futaba S3003 (or the Tamiya TSU-03 if you prefer). The servo-saver is from ABC Hobby (an equivalent to the Tamiya Hi-torque). The two spacers on the left are used to adjust the servo position into the tray. On the second photo, the servo tray featuring a piece of foam placed there in order to protect the servo head from dust and pebbles. You couldn't notice this until now, but there are two holes in the chassis servo tray (only one is visible here) which are meant to let things get both into and out of the chassis.
So far, everything seems normal, including the ABC Hobby servo-saver as an improvement over the stock unit. Well, actually this servo-saver is a little bigger (diameter) but as thin as the stock unit (height over the servo head), which is about the opposite of a tamiya Hi-Torque. This will soon appear to be very important:
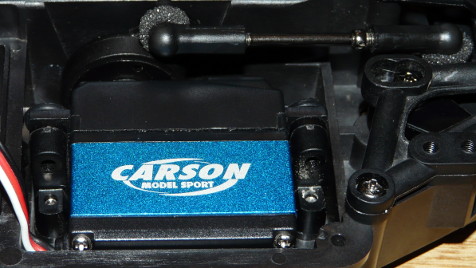
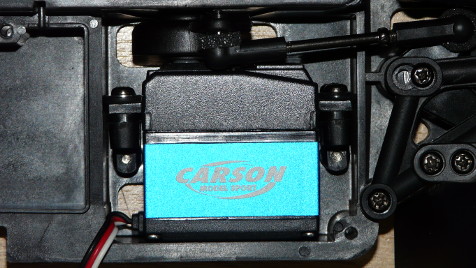
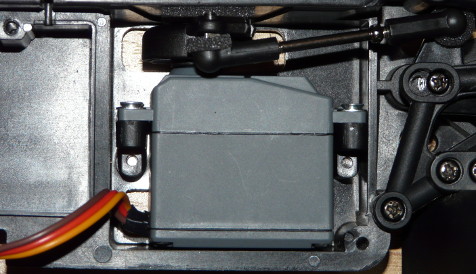
The first photo shows the steering servo once installed into the tray: same thing on the second photo, different angle allowing to see the second hole in the chassis servo tray. There is so few room left between the servo saver and the tray wall that I didn't dare to stick the thin protection foam. I couldn't remove any spacer to better fit the servo because it was already set to the minimum height on the stays.
Tamiya is well-known for precision and tight fit, but this does not apply here: not being able to install the recommended foam protection for the servo saver is a warning that something is going wrong. Of course, you could use a low-profile servo such as the Tamiya 45065 TSU-06 to definitely solve the problem. Right, but that's not the point here: whenever such a specific servo would have been required, Tamiya would have specified it on the box and manual.
The problem lies elsewhere: the Carson CS3 servo dimensions are not the same as the Futaba S3003 despite comparable mechanical specifications. Like the majority of these basic servos, the Carson is slightly bigger than a Futaba, making it not compatible with the XV-01 chassis. Because I had no more S3003 in my spares, I used a HobbyKing HK 15269 servo: equivalent mechanical specifications in a smaller case, but yet not as compact as the S3003. Anyway, it fits the servo tray once the spacers are removed:

Conclusion: use the Futaba S3003 servo, the Tamiya TSU-03 (used in most XB Pro models) or make sure you already have a compact and compatible servo of your liking in stock. Or you could use about any low-profile servo of your choice.
By the way, let's talk about those holes in the XV-01 chassis servo tray: it is natural to first think about how to fill them before to wonder why Tamiya made them  . Actually, you will soon realize it is not easy to fill these holes because Tamiya made them very close to the tray walls, making it very complicated to fill unless you use something to cover the whole tray bottom (with a lexan sheet for example). Bad idea:
- the servo-saver reaches the bottom of the tray, so filling this hole would require to raise the servo mount.
- filling the bottom of the chassis would prevent pebbles to get in the tray from below the chassis, but they would still get in from above. Actually, probably more would get in from above than from below the chassis. This is probably what decided Tamiya to make these holes since they facilitate the natural evacuation of anything that gets into the tray.
In concrete, you can not protect the servo, and more generally the steering: so instead of fighting against everything that could get in, it is wiser to make it easier for these things to get out of the chassis. Which means you should install a “waterproof” servo if you want to run your model on the wet, in the mud or snow. Oh, and make sure it fits the tray too .
Motor cables
The steering servo is not the only one electronic component in a chassis: the esc-motor combo will require very close attention too due to the XV-01 chassis.
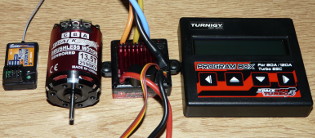
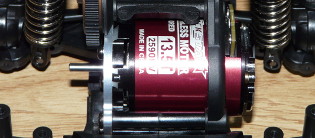
On the first photo, the rest of electronics to install: one 13.5T sensored brushless combo (with programming card) and a 2.4GHz receiver. You can notice the ESC has no fan: remember this because it is important, very important as you will see later. On the second photo, the motor once installed on its mount: you can immediately guess that soldering cables there will be tricky. Above all, you can guess that you will need to solder cables from the rear of the motor, the opposite way of what we usually do. On the third photo, the ESC and the receiver were just placed where the manual recommends: as you can see, this is not the definitive layout because you still can see the Carson steering servo that was replaced at the previous step.
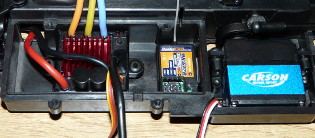
So now, this is the general chassis overview before installing electronics:
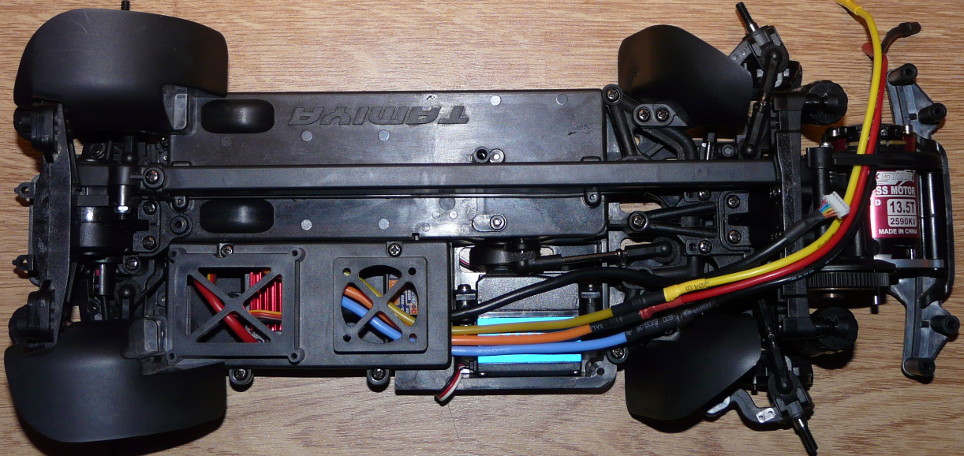
Here again, this is a first try, meaning the components were only placed to get a more concrete overview of what to do. In concrete, the 15cm long motor cables can't reach the motor, which explains why you can see 20cm long extensions. As you can see, the ESC is located as close as possible, thanks to the small-size receiver.
As for the sensor cable, extensions do not exist so you need to find one over 20cm long, which is rather uncommon. I found out that Speed Passion sells a 25cm cable under the reference 162803: this is an strict minimum for the XV-01 chassis (I couldn't try if it is long enough though). Tamiya also sells long sensor cables, one with reference 17804088 (27cm long) and another with reference 54381 (35cm long). The first one looks perfect for the XV-01 chassis but it is pretty much impossible to find. So get the second one which is easy to find in any good RC store, even if it is somewhat too long for the use. Anyway.
Before processing with the brushless combo I choose for my model, I wondered how things would go using conventional brushed motors, for example the stock 540 Mabuchi motor, or the popular Sport Tuned motor:
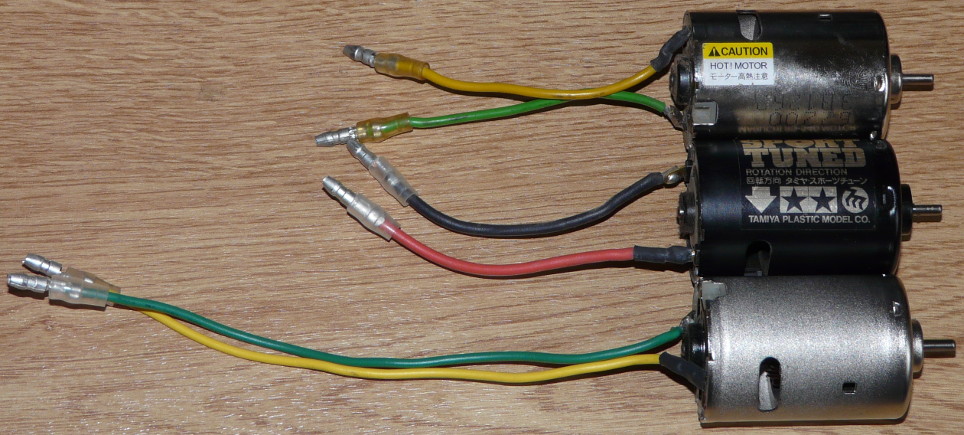
Nice!
From the top, a standard 540 Mabuchi supplied with zillions of kits like M-03s and TT-01s. Next is the Sport Tuned motor: so far, the cables are about 9-10cm long on both motors. Last, the 540 Mabuchi supplied with the XV-01 kit: cables are 16-17cm long!
So Tamiya supplies the motor with longer cables than usual with the XV-01 kits (and the Fox [Novafox], Wild One or Bruiser/Mountaineer re-releases for example). However, you can use standard-length motors like the Sport Tuned if you reverse the positions of the ESC and receiver in the tray. If needed, Tamiya has motor cable extensions in their catalog under the reference 54380.