")
The Grasshopper 2 chassis rebuilt and custom modifications
The basic idea is to rebuild this model bringing a few modifications in order to improve its performance and its handling. The first step is to replace all the plastic bearings by ball bearings.
- Replacement of the stock motor with a Mabuchi 540:
For this, the manual is very clear as it details the changes to make. In short, you have to remove the motor support, change the 10 tooth pinion by an 18 tooth and reassemble it directly onto the gearbox. - Exhaustive review of the suspension system:
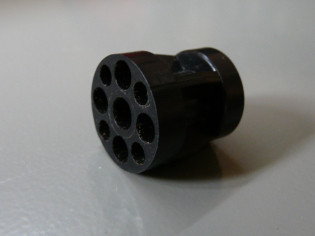
At the front, it just needed cleaning and greasing. At the rear, same operations plus the replacement of the springs because they were torn. So, nothing serious. - eplacement of the 4 wheels with a Mad Fighter set:
No problem at the front as it is a direct fit. At the rear however, the stock extensions have t be replaced by hex adapters as the rims architecture is totally different. Tamiya anticipated this as these adapters are available as reference 53913 - RC Frog 2005 Alum Wheel Adapt.
Replace the C7 extensions...
...with the hex adapters...
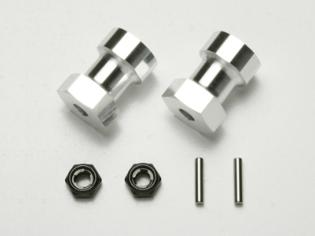
...to get this result.
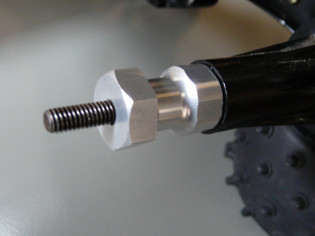
Any Tamiya hex rim can be fitted thanks to these.
- Replacement of the antenna pipe mount:
The stock mount is broken and can't be repaired. So I made a "custom" one out of a servo axle directly screwed inside the chassis. It is screwed onto a support that is meant to fit the mechanical speedo plates. Then I inserted the antenna pipe into it where you normally find the servo head.
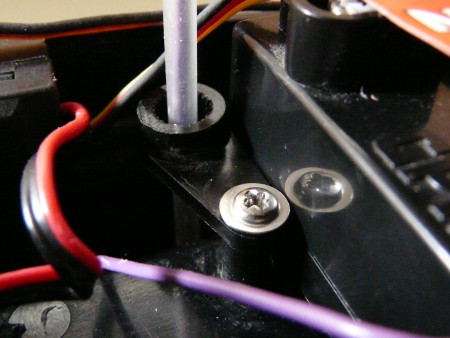
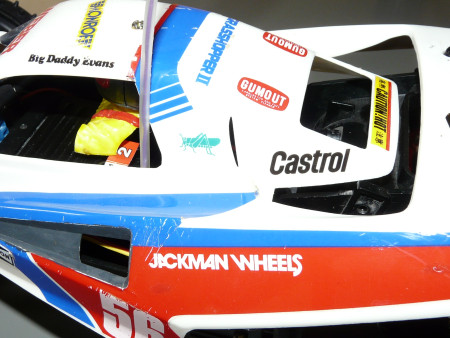
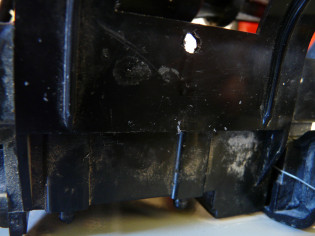
The antenna pipe is now located into the chassis instead of being in front of the rear wing (under the "L" of "Castrol" in the last photo).
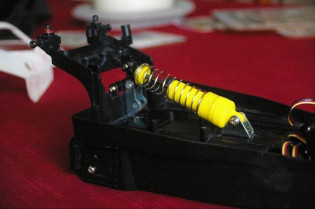
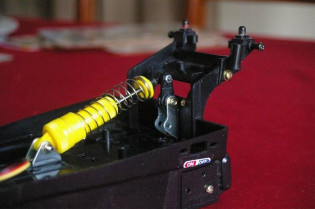
- Third rear shock setup (this is an adaptation of the Lunch Box mod):
For this one, I had to proceed differently from the Lunch Box, even if the base idea remains the same. Bad luck, there is no room enough between the chassis and the gearbox to place a damper there. Next problem: the Grasshopper rear side of the chassis is lower than the Lunch Box'. The total height doesn't allow you to fit a standard damper.
I got the idea from a model I saw in my friend Teamneogordini's collection: the Academy Roadrunner which is a Grasshopper "copy". More than a copy, Academy had directly fitted a third rear suspension system to handle the gearbox movement. What I made here is a direct adaptation of their system.
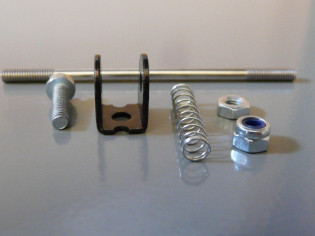
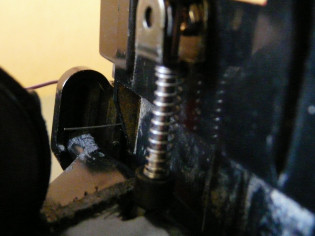
The first step is to cut the gearbox housing to insert a shock head (see the Lunch Box page for more details). On the second photo, you can see what is needed for this suspension system: one tie rod, one 3x10 screw, one Nilstop nut (diameter 3), two standard nuts (diameter 3, only 1 is shown), one U shape damper stay, and one pen spring (yes!). The third photo shows a small bit of plastic that is located at the rear of the chassis: cut it because it is right where the future damper goes.
Cut gearbox housing with the shock head
What's needed (1 nut is missing)
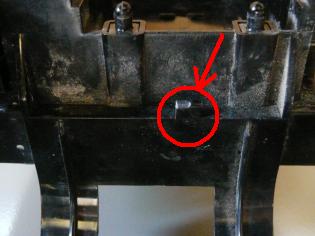
Plastic bit to be cut
Forth step: drill the chassis as high as possible in the exact line up of the damper head. To find the correct line up, the best is to screw the tie rod into the damper head. The best drill position is right under the top curved edge of the chassis. Then don't forget to insert the spring onto the tie rod and to cover it with the U shape stay.
Last steps: the system assembly. Screw the Nilstop nut until it touches the 3x10 screw head. Then screw the first standard 3mm nut until it touches the Nilstop nut. Inside the U shape stay, place the second 3mm standard nut, and from the inside of the chassis, screw the screw-Nilstop-nut into it. Screw it until the edge of the screw reaches the edge of the nut into the U shape stay.
Final step: from the inside of the chassis, unscrew the standard 3mm nut until it reaches the chassis so the system is correctly fitted. Then unscrew the Nilstop nut until it reaches the standard 3mm nut in order to strengthen the system.
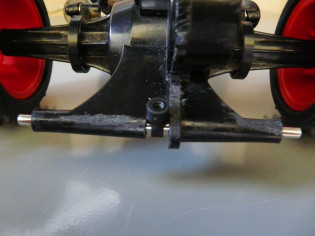
Plastic bit cut and chassis drilled
The fix inside the chassis

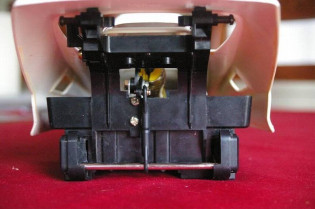
The final result
With this system, we have a suspension solution for the gearbox movement. Not as efficient as the Lunch Box mod, but this is the only solution I could think of given the lack of room. Note that this mod can be directly adapted to the Hornet.
While I was searching the web for a suspension solution for the rear drivetrain, I found another solution made by TAZ-NZ, a TamiyaClub member:
I think his solution is beautiful: he uses a cantilever system to convert the gearbox vertical movement into an horizontal movement that is handled by the shock located inside the chassis.
However, this solution raised doubts:
- The shock is placed inside the chassis, thus it seriously reduces the available room for electronics (receiver and speedo). Especially because I use a Tamiya CPR-01 unit that is pretty big (it combines the receiver and the ESC).
- The gearbox movement can be brutal, especially with a 540 motor and on jump landings. Even more, the movement is rarely straight: to be straight, the 2 rear wheels have to reach the ground at the same time, the jump needs to be very well balanced (the buggy jumped in straight line) and the landing zone has to be perfectly flat. As far as my experience goes, these three conditions are very rare: they almost never occur at the same time.
For these two reasons, mainly the solution reliability, I chose to copy what Academy did on their Roadrunner.
The rebuilt process is now finished. The Grasshopper is not in stock condition because I wanted to use as many spare parts I already had to limit the budget. The result is a very cheap buggy (20€ spent for parts, 10€ for the buggy itself), and it performs almost like my Hornet.